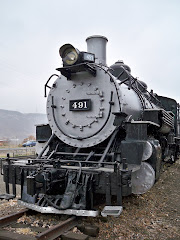
This is the photo that started it all. I saw this and said, "I got to have these, I can do this". That was back in October 2009.
 Alamosa, CO - Work train
I started collecting the 3 box cars, 2 flat cars and a passenger car. I was going to attempt 6 cars at once. I finished my Tool Car about a year ago and remember that going pretty fast/easy. So why not 6 more?
I was in Denver in November so I was able to get most of the materials from Caboose Hobbies. They have every part imaginable and a very helpful staff. I showed them my picture and said I want to build these.
I started working on the Wheel & Tie Car first. I used a Bachmann On30 flat car as my base and scratch built the rest. I used a few sizes of Evergreen styrene for all the pieces. My rotary tool became my best friend.
 Starting with the posts.
 Building the tie enclosure.
 Adding the ends.
 Wire detail and wheel holders installed.
 28 hand drilled holes for the grab irons, plus bolt details added.
 Once I finished construction on the Wheel & Tie car, I started the Rail & Tie Car.
 Rail and Tie Car might look simple, but it had some tricky points to it.
 Here is the lot awaiting decals on decal day. I forgot to take more pictures, but here are two box cars with new paint. Behind it is the sleeper car. I made some major modifications to that (see below). And then the Kitchen/Diner car.
 One down, five to go! Once again I used San Juan decals (which are amazing) along with HO scale Roman Railroad Alphabet and Number set from MicroScale.
 After the decals, I worked on some extras for the Wheel & Rail car and the Rail & Tie Car. On the far left is a pile of HO rails cut to fit the length of the Rail & Tie Car painted to look rusty . Then the extra wheels for the Wheel & tie car, again painted rusty. On the far right, hand cut and hand painted ties. I used a coat of Rail Brown and the a second coat of Grimy Black to give them a nice oily look to them.
 Here are all the new cars lined up waiting for a new assignment.
 Originally I planned for this car to be a Kitchen car, but because of limited passenger car options (see below) I went with the Sleeper Car. 04944 had some major modifications which started out as a normal box car, and cutting out the existing door. I replaced the hole with styrene and a door frame from Grandt Lines. The windows and stove pipe are Grandt Lines as well. I originally had the step in front of the door hanging down a little ways suspended by small strips of styrene, but they were to fragile and kept breaking off during painting. So I just glued it to the side of the car, which made it very durable. The prototype of 04944 is at the Colorado Railroad Museum, which I saw and liked. That's why I chose to number it 04944.
 D&RGW 04988
 Block Car 04444 was pretty staight forward. Paint and decals.
 Cable Car 04426 - Paint and decals.
 Rail & Tie Car 06051
 Wheel & Tie Car 06092
 Kitchen & Diner Car 0252 was a last minute addition. I was searching for a MOW car to model out of a passenger car and 0252 was my best option. The prototype looks just like the passenger cars I could buy. With 0252 taking on the role of the kitchen car I was free to make the sleeper car. As you can see I knocked out three windows and put up curtains. I wasn't sure what the B&B meant so I asked the Narrow Gauge Forum and learned that it stood for "Bridge & Building Department".
#473 Leading the Work Train